Firebase Push Notifications In React
Firebase Push Notifications In React
Chidi Orji
Notifications have become a stable part of the web nowadays. It’s not uncommon to come across sites asking for permission to send notifications to your browser. Most modern web browsers implement the push API and are able to handle push notifications. A quick check on caniuse shows that the API enjoys wide support among modern chrome-based browsers and Firefox browser.
There are various services for implementing notifications on the web. Notable ones are Pusher and Firebase. In this article, we’ll implement push notifications with the Firebase Cloud Messaging (FCM) service, which is “a cross-platform messaging solution that lets you reliably send messages at no cost”.
I assume that the reader has some familiarity with writing a back-end application in Express.js and/or some familiarity with React. If you’re comfortable with either of these technologies, then, you could work with either the frontend or backend. We will implement the backend first, then move on to the frontend. In that way, you can use whichever section appeals more to you.
So let’s get started.
Types Of Firebase Messages
The Firebase documentation specifies that an FCM implementation requires two components.
- A trusted environment such as Cloud Functions for Firebase or an app server on which to build, target, and send messages.
- An iOS, Android, or web (JavaScript) client app that receives messages via the corresponding platform-specific transport service.
We will take care of item 1 in our express back-end app, and item 2 in our react front-end app.
The docs also state that FCM lets us send two types of messages.
- Notification messages (sometimes thought of as “display messages”) are handled by the FCM SDK automatically.
- Data messages are handled by the client app.
Notification messages are automatically handled by the browser on the web. They can also take an optional data payload, which must be handled by the client app. In this tutorial, we’ll be sending and receiving data messages, which must be handled by the client app. This affords us more freedom in deciding how to handle the received message.
Setting Up A Firebase Project
The very first thing we need to do is to set up a Firebase project. FCM is a service and as such, we’ll be needing some API keys. This step requires that you have a Google account. Create one if you don’t already have one. You can click here to get started.
After setting up your Google account, head on to the Firebase console.
Click on add project. Enter a name for your project and click on continue. On the next screen, you may choose to turn off analytics. You can always turn it on later from the Analytics menu of your project page. Click continue and wait a few minutes for the project to be created. It’s usually under a minute. Then click on continue to open your project page.
Once we’ve successfully set up a project, the next step is to get the necessary keys to work with our project. When working with Firebase, we need to complete a configuration step for the frontend and backend separately. Let’s see how we can obtain the credentials needed to work with both.
Frontend
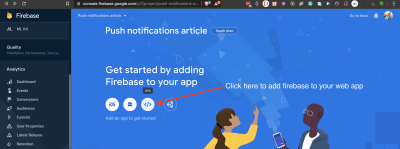
On the project page, click on the icon to add Firebase to your web app.
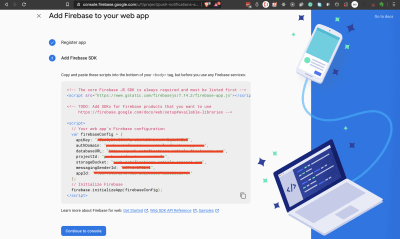
Give your app a nickname. No need to set up Firebase hosting. Click on Register app and give it a few seconds to complete the setup. On the next screen, copy out the app credentials and store them somewhere. You could just leave this window open and come back to it later.

We’ll be needing the configuration object later. Click on continue to console to return to your console.
Backend
We need a service account credential to connect with our Firebase project from the backend. On your project page, click on the gear icon next to Project Overview to create a service account for use with our Express backend. Refer to the below screenshot. Follow steps 1 to 4 to download a JSON file with your account credentials. Be sure to keep your service account file in a safe place.
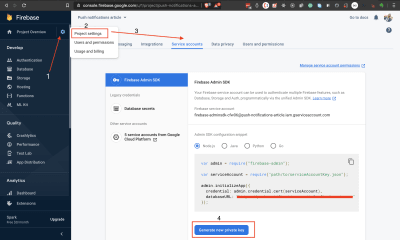
I’ll advise you not to download it until you’re ready to use it. Just remember to come back to these sections if you need a refresher.
So now we’ve successfully set up a Firebase project and added a web app to it. We’ve also seen how to get the credentials we need to work with both the frontend and backend. Let’s now work on sending push notifications from our express backend.
Getting Started
To make it easier to work through this tutorial, I’ve set up a project on Github with both a server and a client. Usually, you’ll have a separate repo for your backend and frontend respectively. But I’ve put them together here to make it easier to work through this tutorial.
Create a fork of the repo, clone it to your computer, and let’s get our front-end and back-end servers started.
- Fork the repo and check out the
01-get-startedbranch. - Open the project in your code editor of choice and observe the contents.
- In the project root, we have two folders,
client/andserver/. There’s also a.editorconfigfile, a.gitignore, and aREADME.md. - The client folder contains a React app. This is where we will listen for notifications.
- The server folder contains an express app. This is where we’ll send notifications from. The app is from the project we built in my other article How To Set Up An Express API Backend Project With PostgreSQL.
- Open a terminal and navigate to the
client/folder. Run theyarn installcommand to install the project dependencies. Then runyarn startto start the project. Visithttp://localhost:3000to see the live app. - Create a
.envfile inside theserver/folder and add theCONNECTION_STRINGenvironment variable. This variable is a database connection URL pointing to a PostgreSQL database. If you need help with this, check out theConnecting The PostgreSQL Database And Writing A Modelsection of my linked article. You should also provide thePORTenvironment variable since React already runs on port3000. I setPORT=3001in my.envfile. - Open a separate terminal and navigate to the
server/folder. Run theyarn installcommand to install the project dependencies. Runyarn runQueryto create the project database. Runyarn startdevto start the project. Visit http://localhost:3001/v1/messages and you should see some messages in a JSON format.
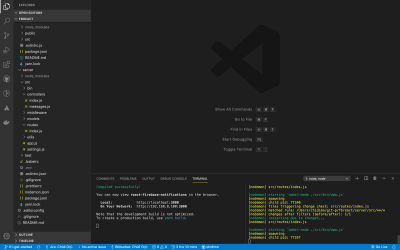


Now that we have our front-end and back-end apps running, let’s implement notifications in the backend.
Setting Up Firebase Admin Messaging On The Backend
Sending out push notifications with FCM on the backend requires either the Firebase admin SDK or the FCM server protocols. We’ll be making use of the admin SDK in this tutorial. There’s also the notifications composer, which is good for “testing and sending marketing and engagement messages with powerful built-in targeting and analytics”.
In your terminal, navigate to the server/ folder and install the Admin SDK.
# install firebase admin SDK yarn add firebase-adminOpen your .env file and add the following environment variable.
GOOGLE_APPLICATION_CREDENTIALS="path-to-your-service-account-json-file"The value of this variable is the path to your downloaded service account credentials. At this point, you probably want to go back to the section where we created the service account for our project. You should copy the admin initialization code from there and also download your service account key file. Place this file in your server/ folder and add it to your .gitignore.
Remember, in an actual project, you should store this file in a very secure location on your server. Don’t let it get into the wrong hands.
Open server/src/settings.js and export the application credentials file path.
# export the service account key file path export const googleApplicationCredentials = process.env.GOOGLE_APPLICATION_CREDENTIALS;Create a file server/src/firebaseInit.js and add the below code.
import admin from 'firebase-admin'; import { googleApplicationCredentials } from './settings' const serviceAccount = require(googleApplicationCredentials); admin.initializeApp({ credential: admin.credential.cert(serviceAccount), databaseURL: 'your-database-url-here' }); export const messaging = admin.messaging();We import the admin module from firebase-admin. We then initialize the admin app with our service account file. Finally, we create and export the messaging feature.
Note that I could have passed the path to my service account key file directly, but it is the less secure option. Always use environment variables when dealing with sensitive information.
To check that you completed the initialization successfully, open up server/src/app.js and include the following lines.
import { messaging } from './firebaseInit' console.log(messaging)We import the messaging instance and log it in the console. You should see something like the picture below. You should remove these once you verify that your admin is set up correctly.
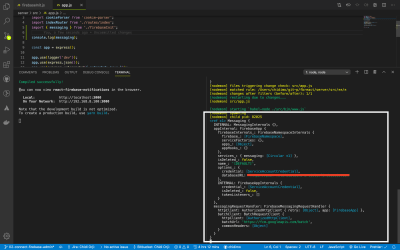
If you run into any problems, you can check out the 02-connect-firebase-admin branch of my repo for comparison.
Now that we’ve successfully setup admin messaging, let’s now write the code to send the notifications.
Sending Push Notifications From The Backend
FCM data message configuration is very simple. All you have to do is supply one or more target(s) and a JSON of the message you wish to send to the client(s). There are no required keys in the JSON. You alone decide what key-value pairs you want to include in the data. The data messages form works across all platforms, so our notification could also be processed by mobile devices.
There are additional configurations for other platforms. For example, there’s an android settings that only work with android devices and apns settings that work on only iOS devices. You can find the configuration guide here.
Create a file server/src/notify.js and enter the below code.
import { messaging } from './firebaseInit'; export const sendNotificationToClient = (tokens, data) => { // Send a message to the devices corresponding to the provided // registration tokens. messaging .sendMulticast({ tokens, data }) .then(response => { // Response is an object of the form { responses: [] } const successes = response.responses.filter(r => r.success === true) .length; const failures = response.responses.filter(r => r.success === false) .length; console.log( 'Notifications sent:', `$ {successes} successful, $ {failures} failed` ); }) .catch(error => { console.log('Error sending message:', error); }); };We created a function that accepts an array of token strings and a data object. Each token string represents a device that has accepted to receive notifications from our back-end application. The notification will be sent to each client in the tokens array. We’ll see how to generate the token in the front-end section of the tutorial.
The messaging instance’s sendMulticast method returns a promise. On success, we get an array from which we count the number of successes as well as failed notifications. You could certainly handle this response anyhow you want.
Let’s use this function to send out a notification each time a new message is added to the database.
Open server/src/controllers/message.js and update the addMessage function.
import { sendNotificationToClient } from '../notify'; export const addMessage = async (req, res) => { const { name, message } = req.body; const columns = 'name, message'; const values = `'$ {name}', '$ {message}'`; try { const data = await messagesModel.insertWithReturn(columns, values); const tokens = []; const notificationData = { title: 'New message', body: message, }; sendNotificationToClient(tokens, notificationData); res.status(200).json({ messages: data.rows }); } catch (err) { res.status(200).json({ messages: err.stack }); } };This function handles a post request to the /messages endpoint. Once a message is successfully created, a notification is sent out by the sendNotificationToClient function followed by the response to the client. The only missing piece in this code is the tokens to send the notifications to.
When we connect the client app, we’ll copy the generated token and paste it in this file. In a production app, you’ll store the tokens somewhere in your database.
With this last piece of code, we’ve completed the back-end implementation. Let’s now switch over to the frontend.
The corresponding branch in my repo at this point is 03-send-notification.
Setting Up Firebase Messaging Notifications On The Client
Let’s take a look at the main components of our front-end React app.
Open up client/src/App.js and inspect the content. I’ll leave out most of the import statements and just look at the program logic.
# library imports import { Messaging } from './Messaging'; axios.defaults.baseURL = 'http://localhost:3001/v1'; const App = () => { return ( <Fragment> <ToastContainer autoClose={2000} position="top-center" /> <Navbar bg="primary" variant="dark"> <Navbar.Brand href="#home">Firebase notifictations with React and Express</Navbar.Brand> </Navbar> <Container className="center-column"> <Row> <Col> <Messaging /> </Col> </Row> </Container> </Fragment> ); }; export default App;This is a regular react component styled with react-bootstrap. There’s a toast component right at the top of our app, which we shall use to display notifications. Note that we also set the baseURL for the axios library. Everything of note happens inside the <Messaging /> component. Let’s now take a look at its content.
Open up client/src/Messaging.js and inspect the content.
export const Messaging = () => { const [messages, setMessages] = React.useState([]); const [requesting, setRequesting] = React.useState(false); React.useEffect(() => { setRequesting(true); axios.get("/messages").then((resp) => { setMessages(resp.data.messages); setRequesting(false); }); }, []); return ( <Container> {/* form goes here */} <div className="message-list"> <h3>Messages</h3> {requesting ? ( <Spinner animation="border" role="status"> <span className="sr-only">Loading...</span> </Spinner> ) : ( <> {messages.map((m, index) => { const { name, message } = m; return ( <div key={index}> {name}: {message} </div> ); })} </> )} </div> </Container> ); };We have two state variables, messages and requesting. messages represent the list of messages from our database and requesting is for toggling our loader state. We have a React.useEffect block where we make our API call to the /messages endpoint and set the returned data in our messages state.
In the return statement, we map over the messages and display the name and message fields. On the same page, we include a form for creating new messages.
<Formik initialValues={{ name: "", message: "", }} onSubmit={(values, actions) => { setTimeout(() => { alert(JSON.stringify(values, null, 2)); actions.setSubmitting(false); toast.success("Submitted succesfully"); }, 1000); }} > {(prop) => { const { handleSubmit, handleChange, isSubmitting } = prop; return ( <> <InputGroup className="mb-3"> <InputGroup.Prepend> <InputGroup.Text id="basic-addon1">Name</InputGroup.Text> </InputGroup.Prepend> <FormControl placeholder="Enter your name" onChange={handleChange("name")} /> </InputGroup> <InputGroup className="mb-3"> <InputGroup.Prepend> <InputGroup.Text id="basic-addon1">Message</InputGroup.Text> </InputGroup.Prepend> <FormControl onChange={handleChange("message")} placeholder="Enter a message" /> </InputGroup> {isSubmitting ? ( <Button variant="primary" disabled> <Spinner as="span" size="sm" role="status" animation="grow" aria-hidden="true" /> Loading... </Button> ) : ( <Button variant="primary" onClick={() => handleSubmit()}> Submit </Button> )} </> ); }} </Formik>We’re using the Formik library to manage our form. We pass the <Formik /> component an initialvalues props, an onSubmit prop and the form component we want to render. In return, we get back some handy functions such as handleChange which we can use to manipulate our form inputs, and handleSubmit which we use to submit the form. isSubmitting is a boolean that we use to toggle the submit button state.
I encourage you to give formik a try. It really simplifies working with forms. We will replace the code in the onSubmit method later.
Let’s now implement the method that will request a browser’s permission and assign it a token.
To start using Firebase in the frontend, we have to install the Firebase JavaScript client library. Note that this is a different package from the firebase-admin SDK.
# install firebase client library yarn add firebaseCreate a file client/src/firebaseInit.js and add the following content.
import firebase from 'firebase/app'; import 'firebase/messaging'; const config = { apiKey: "API-KEY", authDomain: "AUTH-DOMAIN", databaseURL: "DATABASE-URL", projectId: "PROJECT-ID", storageBucket: "STORAGE-BUCKET", messagingSenderId: "MESSAGING-SENDER-ID", appId: "APP-ID" }; firebase.initializeApp(config); const messaging = firebase.messaging(); // next block of code goes hereThe Firebase docs state that:
“The full Firebase JavaScript client includes support for Firebase Authentication, the Firebase Realtime Database, Firebase Storage, and Firebase Cloud Messaging.”
So here, we import only the messaging feature. At this point, you could refer to the section on creating a Firebase project to get the config object. We then initialize Firebase and export the messaging feature. Let’s add in the final block of code.
export const requestFirebaseNotificationPermission = () => new Promise((resolve, reject) => { messaging .requestPermission() .then(() => messaging.getToken()) .then((firebaseToken) => { resolve(firebaseToken); }) .catch((err) => { reject(err); }); }); export const onMessageListener = () => new Promise((resolve) => { messaging.onMessage((payload) => { resolve(payload); }); });The requestFirebaseNotificationPermission function requests the browser’s permission to send notifications and resolves with a token if the request is granted. This is the token that FCM uses to send a notification to the browser. It is what triggers the prompt you see on browsers asking for permission to send a notification.
The onMessageListener function is only invoked when the browser is in the foreground. Later, we will write a separate function to handle the notification when the browser is in the background.
Open up client/src/App.js and import the requestFirebaseNotificationPermission function.
import { requestFirebaseNotificationPermission } from './firebaseInit'Then inside the App function, add the below code before the return statement.
requestFirebaseNotificationPermission() .then((firebaseToken) => { // eslint-disable-next-line no-console console.log(firebaseToken); }) .catch((err) => { return err; });Once the app loads this function runs and requests the browser’s permission to show notifications. If the permission is granted, we log the token. In a production app, you should save the token somewhere that your backend can access. But for this tutorial, we’re just going to copy and paste the token into the back-end app.
Now run your app and you should see the notification request message. Click allow and wait for the token to be logged to the console. Since you’ve granted the browser permission, if we refresh the page you won’t see the banner anymore, but the token will still be logged to the console.

You should know that Firefox browser (v75) doesn’t ask for notification permission by default. The permission request has to be triggered by a user-generated action like a click.
This is a good point for me to commit my changes. The corresponding branch is 04-request-permission.
Let’s now complete the code for saving a message to our database.
Open up client/src/Messaging.js and replace the onSubmit function of our form with the below code.
onSubmit={(values, actions) => { axios .post("/messages", values) .then((resp) => { setMessages(resp.data.messages.concat(messages)); actions.setSubmitting(false); toast.success("Submitted succesfully"); }) .catch((err) => { console.log(err); toast.error("There was an error saving the message"); }); }}We make a post request to the /messages endpoint to create a new message. If the request succeeds we take the returned data and put it at the top of the messages list. We also display a success toast.
Let’s try it out to see if it works. Start the front-end and back-end servers. Before trying out the post request, open server/src/controllers/messages.js and comment out the line where we’re sending the notification.
# this line will throw an error if tokens is an empty array comment it out temporarily // sendNotificationToClient(tokens, notificationData);Try adding some messages to the database. Works? That’s great. Now uncomment that line before continuing.
Copy the notification token from the developer console and paste it into the tokens array. The token is a very long string, as shown below.
const tokens = [ 'eEa1Yr4Hknqzjxu3P1G3Ox:APA91bF_DF5aSneGdvxXeyL6BIQy8wd1f600oKE100lzqYq2zROn50wuRe9nB-wWryyJeBmiPVutYogKDV2m36PoEbKK9MOpJPyI-UXqMdYiWLEae8MiuXB4mVz9bXD0IwP7bappnLqg', ];Open client/src/Messaging.js, import the onMessageListener and invoke it just under the useEffect block. Any position within the function is fine as long it’s before the return statement.
import { onMessageListener } from './firebaseInit'; React.useEffect(() => { ... }, []); onMessageListener() .then((payload) => { const { title, body } = payload.data; toast.info(`$ Firebase Push Notifications In React; $ {body}`); }) .catch((err) => { toast.error(JSON.stringify(err)); });The listener returns a promise which resolves to the notification payload on success. We then display the title and body in a toast. Note that we could have taken any other action once we receive this notification but I’m keeping things simple here. With both servers running, try it out and see if it’s working.
Works? That’s great.
In case you run into problems, you could always compare with my repo. The corresponding branch at this point is 05-listen-to-notification.
There’s just one bit we need to take care of. Right now we can only see notifications when the browser is in the foreground. The point about notifications is that it should pop up whether the browser is in the foreground or not.
If we were to be sending a display message i.e. we included a notification object in our notification payload, the browser will take care of that on its own. But since we’re sending a data message, we have to tell the browser how to behave in response to a notification when our browser is in the background.
To handle the background notification we need to register a service worker with our front-end client.
Create a file client/public/firebase-messaging-sw.js and enter the following content:
importScripts('https://www.gstatic.com/firebasejs/7.14.2/firebase-app.js'); importScripts('https://www.gstatic.com/firebasejs/7.14.2/firebase-messaging.js'); const config = { apiKey: "API-KEY", authDomain: "AUTH-DOMAIN", databaseURL: "DATABASE-URL", projectId: "PROJECT-ID", storageBucket: "STORAGE-BUCKET", messagingSenderId: "MESSAGING-SENDER-ID", appId: "APP-ID" }; firebase.initializeApp(config); const messaging = firebase.messaging(); messaging.setBackgroundMessageHandler(function(payload) { console.log('[firebase-messaging-sw.js] Received background message ', payload); const notificationTitle = payload.data.title; const notificationOptions = { body: payload.data.body, icon: '/firebase-logo.png' }; return self.registration.showNotification(notificationTitle, notificationOptions); }); self.addEventListener('notificationclick', event => { console.log(event) return event; });At the top of the file, we’re importing the firebase-app and the firebase-messaging libraries since we only need the messaging feature. Don’t worry if the import syntax is new. It’s a syntax for importing external scripts into service worker files. Make sure that the version being imported is the same as the one in your package.json. I’ve run into issues that I solved by harmonizing the versions.
As usual, we initialize Firebase, then we invoke the setBackgroundMessageHandler, passing it a callback, which receives the notification message payload. The remaining part of the code specifies how the browser should display the notification. Notice that we can also include an icon to display as well.
We can also control what happens when we click on the notification with the notificationclick event handler.
Create a file client/src/serviceWorker.js and enter the below content.
export const registerServiceWorker = () => { if ('serviceWorker' in navigator) { navigator.serviceWorker .register('firebase-messaging-sw.js') .then(function (registration) { // eslint-disable-next-line no-console console.log('[SW]: SCOPE: ', registration.scope); return registration.scope; }) .catch(function (err) { return err; }); } };This function registers our service worker files. Note that we have replaced the more detailed version generated by React. We first check if the serviceWorker is present in the navigator object. This is simple browser support. If the browser supports service workers, we register the service worker file we created earlier.
Now open client/src/index.js, import this function, and invoke it.
# other imports import { registerServiceWorker } from './serviceWorker' ReactDOM.render( ... ); registerServiceWorker()If all goes well, you should see the service worker’s scope logged to your console.
Open http://localhost:3000/messaging in a second browser and create a message. You should see the notification from the other browser come into view.

With that, we’ve come to the end of this tutorial. The corresponding branch in my repo is 06-handle-background-notification.
Conclusion
In this article, we learned about the different types of notification messages we can send with the Firebase Cloud Messaging (FCM). API. We then implemented the “data message” type on the backend. Finally, we generated a token on the client app which we used to receive notification messages triggered by the back-end app. Finally, we learned how to listen for and display the notification messages when the browser is in either the background or foreground.
I encourage you to take a look at the FCM docs to learn more.
Related Resources
- Firebase, official website
- Fireact, Orji Chidi Matthew, GitHub
- “Firebase: App Success Made Simple,” the npm blog
- Firebase Console
- Firebase Admin Node.js SDK, the npm blog
- WebpushConfig, Firebase Docs
sendMulticast, Firebase Docs- Service Worker Cookbook, Mozilla
- Notification, Firebase Docs
- Firebase Cloud Messaging, Firebase Documentation
- “How To Set Up An Express API Backend Project With PostgreSQL,” Chidi Orji
 (ks, ra, yk, il)
Articles on Smashing Magazine — For Web Designers And Developers

