10 Tips I Learned Art Directing My First Photo Shoot
This article has been contributed by Emelina Spinelli.
My first photo shoot was a little daunting. Leading up to the shoot, I thought “this is easy, I’ll just show up and everything will work out the way it needs to.” Pfha! I caught on to my own thinking a couple weeks before the official shoot and decided to take the bull by the horns.
I planned everything ahead.

I researched different designs and styles, made mood boards, storyboarded the entire process and sent prompts to my clients to be approved. To be honest, it wasn’t that different than doing a traditional website design, logo or other aesthetic.
I had jumped into a project without the previous experience of directing photo shoots. Of course I had experience art-directing other web and print projects. I carried the skill set through to photography.
Alas, here are my suggestions and tips to take into account when art-directing your first custom photo shoot.
#1 Understand Your Client’s Brand Through and Through.
Spend the time upfront learning about your client’s brand. I mean really dive deep and get in there.
Communication is the key to all successful projects.
Understanding your client’s brand (and having them feel that you understand) builds trust and will help you make decisions with your clients throughout the project.
The key here is to envelop yourself into their brand. You want to understand their customers, their story, messaging, their specific brand personality and how they want to be remembered.
How to Communicate that you KNOW the brand.
Each brand is a reflection of the founders and they will want to know that you understand their baby. Go out of your way to communicate to them consistently that you know their brand. Check in with them and make sure they feel heard and understood.
This goes a long way in business relationships. If your clients feel understood, you usually earn creative control. First, have a conversation with your soon-to-be client. Dedicate the meeting to understanding the brand.
Learn about the founders. Understand their motivations, dreams and aspirations. This can give you some serious insight into the brand, imagery and direction.
Second, begin with a questionnaire. You’ll want to get things down in writing. Give your client time to compose their thoughts on a page. This gives both parties a reference guide for decision making through the project.
I’ve been using Typeform for my questionnaires. They even have a pre-designed and written branding questionnaire that will give you insight into the design direction your client is looking to take their brand.
If they don’t have brand guidelines, you can grab a free brand template here. Have them add their specific information and you’ll have a good overview of the brand.
#2 Research and “Steal Like an Artist.”

Set aside time before your shoot to research the brand, the industry and fresh ideas for your new project.
Pinterst and Behance are great sites to gather inspiration for your new creative vibe. My first photo shoot involved a “vintage pin-up” feel. I scoured the web for modern and vintage pin up photos. After learning about how the models pose, the specific make-up style and the vintage style clothes, I felt like I had a great handle on what I was looking for creatively.
Part of the creative process is understanding what has already been done. Consequently, you can push your creativity by taking the project a step farther than the examples you consumed on the web.
#3 Find a Photographer You Trust.
Before you get too deep into your project, make sure you have a trusted photographer. If you’re directing a photo shoot (and you’re not a photographer yourself) you’ll want the experience and perspective that you’re new creative team-member will offer.
Take your new research and ideas to your photographer. He or she will be able to tell you what would look great, what won’t and the challenges that could arise.
Ask how long a typical photo session is, how much editing they will include, if they can work within your budget and what equipment they will need.
Ask them what the best time of day is to shoot? Do they have any locations they would recommend and what sort of equipment they will need to be successful? My photographer asked for a lighting assistant, outlets and extension chords to run outside to our location.
Knowing this upfront helped me prepare and attain the appropriate resources. This saved me from running around the day of the shoot.
#4 Scout the Perfect Location.
I had several outdoor locations in mind for this shoot. I went to each “hidden gem” around the city at the time of day that I wanted to do the shoot. I took photos on my phone cropped to the ideal look for each location (without my “official” model). I asked my business partner to stand in the frames for me so I could get an idea of the proportions and lighting that would be needed.
I recommend scouting ahead. Test the shots on your phone to get a better idea of what to expect the day of. The idea is to remove as much “guesswork” as possible. You’ll know what the shots will look like before the work is even finished.
Your photo genius will appreciate you doing the legwork. When it comes time to shoot they can focus on what they do best, getting you amazing results for your client.
#5 Find Your Perfect Model.
After your initial research, you should know what aesthetic you need in a model.
You could send a casting call out on Craig’s List. Offer your budget, what is needed, how long the shoot is expected to be, if they get prints etc. I asked my photographer if he knew any models. Reach out and ask people you know for recommendations.
If you’re freelancing and looking for a more economical alternative, ask your friends to model (as long as they meet the aesthetic you’re seeking). Hairstylists get you the best of most worlds if you’re not shelling out serious dough for professional models.
Hairstylists are great because they can take care of their own make-up and hair styling. This saves you from hiring a separate make-up and hair stylist for your model. They’ve already got it covered.
After you pick your model, find their clothing size and get the costumes that you need for your shoot. Ask your talent if they have items existing in their wardrobe that meet your specifications. This actually saved me a lot of time in planning costumes. We were able to assemble most of the items out of my model’s closet.
#6 Make a Mood Board and Storyboard to Set Expectations.
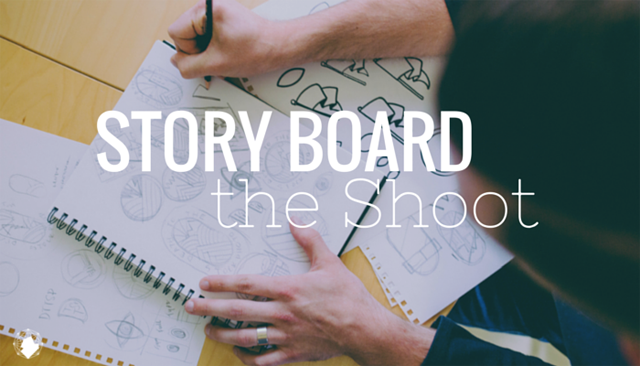
Peruse Pinterest, Google and blogs to find the images that inspire your shoot. Grab photos of poses you wish to re-create, makeup styles, clothes, colors and the like. Make an image collection and send them along to your team members.
Remember to create a storyboard (drafted, drawn images with an explanation) of the exact poses you expect in the shoot. If you’re using the photos for a website, plan to leave room for the copy and any buttons. Plan the design ahead to create the most ideal photo layout.
It’s better to be over prepared than to have to schedule another shoot because you didn’t get the layout you needed.
#7 Know Your Lighting.
Whether you’re photographing people, food or objects, everything looks better with great light.
Early mornings and evenings are a great time to shoot outside. As the sun rises and sets it casts a beautiful warmly lit glow on its subjects. Direct lighting can be harsh and create shadows and uneven lighting.
If you’re shooting indoors, make sure you have additional lights available. You want to be prepared to capture your image and bring in more light if you need. Reflectors are a great tool to soften light and create even tones.
Ask your photographer what they need to be successful with lighting.
#8 Make it Relatable.

Your goal is to capture those candid shots.
Even though your model will be posing, you’ll want things to look organic. The market can relate to the person in the advertisement when they look more “real” and candid.
Are you photographing food or objects? You can always add a more organic feel by adding something living—flowers, plants or greenery. Plants can soften the feel of an image and make it seem more inviting.
#9 Trust your Creative Team.
Ask your team what they need to succeed. Trust your team, whether they are photographers, designers, food stylists, interior staging etc.
I was not fully in-depth at photography when I directed this shoot. As I planned and styled the cloths, the model and the shots, I asked my creative team how they thought it looked and if they had any suggestions.
This isn’t an open call for perfectionism and stalling. It’s to cover your bases.
Ask, so that you’re not missing anything. For example, in the shoot I directed, we set up a take and my photographer told me that it wasn’t going to give me the look I wanted. He had a very good idea of what I was aiming to create. I listened, changed the shot based on his suggestions and voila! We had a masterpiece!
The same is said for you too. If the shot is set up, and there’s a suggestion you have for the photographer or other creatives, pipe in and make your needs known.
#10 Be on Your Toes.
Make sure to stay on your toes and be ready to change plans if necessary.
The weatherman said bluebird skies, but you get to the location and it starts raining. In the case of weather disruptions, have a backup plan, location or another day penciled in the books.
Get your most important key shots first. You want to make sure that the project stays on budget. Make sure you hit your primary shots quickly and efficiently.
Don’t be afraid to scrap an idea during the shoot. In theory it should’ve looked great. However, in the moment things just aren’t working out and it’s taking longer than you expected. That’s a good time to move on to the next pic.
If a shot is going really well, and the chemistry between all the creatives is great, feel free to be spontaneous and experiment. Sometimes that “unplanned” shot is exactly what you were going for.
Most importantly, make sure the communication and expectations between you and the client are impeccable. Art direction and photo shoots can be extraordinarily fun and entertaining! Just make sure everything is planned, and you’re on task and on budget.
Enjoy the fruits of your labor and remember to celebrate when you’re finished! Every great project deserves a little celebration!
–
Emelina Spinelli is an art director, content producer and blogger at d.science. She provides insight, tutorials and online courses to entrepreneurs in marketing, branding and personal development. When she’s not working, find her on Instagram.
